
Most people only do what they are asked […] Being successful requires being proactive and not waiting for life to come to you […] Initiation always involves some degree of risk […] Conversely, doing only what you’re told entails no risk and carries no responsibility. It’s playing safe.
From One Behavior Separates The Successful From The Average
Author: pescadon
Programador de videojuegos y de cosas aburridas
This weekend I was fighting to implement Admob (Google Mobile Ads) Interstitial and Rewarded ADS with mediation on Unity 5 for iOS and Android.
I have a working project with its .unitypackage file with all the necessary libs, adaptors and SDK to add to your project and an optional class to display the ads if you don’t want to write your own code.
You can find the project and instructions here
https://github.com/pescode/Unity5-Admob-with-Mediation
The project supports mediation of the following sources
AdColony, AppLovin, Chartboost, Facebook Audience Network, UnityAds, Vungle
Notes:
There is a bug on iOS with the latest version of Google Mobile Ads 3.0.6 . When you request a rewarded ad the app crash. For that reason my project is using Google Mobile Ads 3.0.5. I have open a discussion here.EDIT: The plugin has been updated and now is using GoogleMobileAds 3.0.7 that fixes that bug on iOS.- On iOS it seems that the AdMob adapter for UnityAds is outdated because its only working with UnityAds v1.5. I have open a discussion here.
You’ve finished your game and you are now ready to prepare the screenshots and other marketing stuff to promote it. Your game is available in XX languages and you just realize that you will have to COPY+PASTE several texts in several languages on several screenshots many MANY times!!!… to give you a perspective of what is happening, you need to translate those “promotional”texts on every SINGLE PICTURE…

I made that process once but I’m not ready to repeat the whole nasty and tedious process again, it’s time to invoke my programming super powers!
If you never heard of the app SKETCH or never give it a try, go now and start playing with it!. Sketch is an awesome tool that you can use to build apps, webs, and more… you can draw in Illustrator if you want and copy+paste your vector on Sketch, together are fantastic!.
I made a plugin for that app that allows me to replace the text very fast in other language… let’s say that I want to translate “EASY TO PLAY!” to Spanish “FACIL DE JUGAR!” in every picture, you will normally select the text layer, copy your localization text, paste on the selected text layer, adjust width and repeat until you die… with this script you just need to
- Run the script
- Write the text you want to replace (in our case “EASY TO PLAY”)
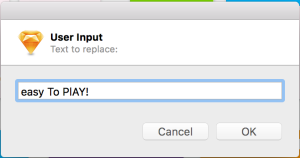
- Write the new text value (in our case “FACIL DE JUGAR!”)

- And… let the code do its magic!

Get the code! Just copy&paste on Plugins->Custom Plugin
I will try to write this post in English.
This month at Roshka Studios we wanted to update our Windows Phone games ( Cquence, MiniChase and Escape Fast ) adding some improvements and changing to Windows Store Phone 8.1 Unity3D build. We also wanted to start working with ADduplex. The problem was that we didn’t find a plugin or a tutorial to implement ADduplex API in our Phone 8.1 project. You can find some tutorials here and here but I believe that they only work with the old Phone 8.0 build.
I found a very easy way to integrate ADduplex and MS Advertising in our Windows Store projects so lets get started!
1- We have to create a class to communicate between Unity and our VS project. We will use this class to show ADduplex and MS Advertising interstitial ads whenever we want. Lets call this class Interop.cs.
public static class Interop
 {
  public static Action OnShowInterstitial = delegate { };
  public static Action OnPreloadInterstitial = delegate { };
static Interop() { OnShowInterstitial = delegate { }; OnPreloadInterstitial = delegate {}; }public static void PreloadInterstitialAd() { OnPreloadInterstitial (); }public static void ShowInterstitialAd() { OnShowInterstitial(); } }
From now on, when we want to display our interstitial ad in our game, We only have to put Interop.ShowInterstitialAd(); in any part of our code. If we want to preload our interstitial ad ( this is specially for MS Advertising Interstitial videos ), We can do it by using Interop.PreloadInterstitialAd(); in any part of our code.
2- Go to File -> Build Settings -> Select Windows Store -> Phone 8.1 -> check C# project and then click the magic Build button.
3- Download and install Microsoft Universal Ad Client SDK and ADduplex SDK
4- Open your game VS project. Right click in References -> Add Reference…

5- Find and select ADduplex SDK for Windows Phone 8.1 (XAML) and Ad Mediator SDK for Windows Phone 8.1 XAML -> Click OK

6- Add the following line at the beginning of the OnLaunched method in the App.xaml.cs file AdDuplex.Universal.Controls.WinPhone.XAML.AdDuplexClient.Initialize(“YOUR-ADDUPLEX-APP-KEY”);
protected override void OnLaunched(LaunchActivatedEventArgs args)
{
 AdDuplex.Universal.Controls.WinPhone.XAML.AdDuplexClient.Initialize("YOUR-ADDUPLEX-APP-KEY");
 splashScreen = args.SplashScreen;
 InitializeUnity(args.Arguments);
}
7- In MainPage.xaml.cs add the following line inside public MainPage()
 Interop.OnShowInterstitial += OnShowInterstitial;
 Interop.OnPreloadInterstitial += PreloadInterstitial;
 // This is just to randomly show first ADduplex or MS Interstitial video
 Random adsToShow = new Random();
 if (adsToShow.Next(0, 2) == 0)
 {
    showMS = true;
 }
8- Now add the following line in MainPage.xaml.cs
 AdDuplex.Universal.Controls.WinPhone.XAML.InterstitialAd interstitialAd;
 InterstitialAd MsAdvertising = new InterstitialAd();
 private string AdAppID = "YOUR-MS-APP-ID-(PUBCENTER)";
 private string AdUnitID = "YOUR-MS-AD-UNIT-ID-(PUBCENTER)";
 bool showMS = false;
 private void PreloadInterstitial()
 {
    // TestInterstitial();
    MsAdvertising.RequestAd(AdType.Video, AdAppID, AdUnitID);
 }

 private void TestInterstitial()
 {
    // Use these values to test if Ms Advertising is working
    AdAppID = "d25517cb-12d4-4699-8bdc-52040c712cab";
    AdUnitID = "11389925";
 }
 private void OnShowInterstitial()
 {
   AppCallbacks.Instance.InvokeOnUIThread(new AppCallbackItem(() =>
   {
     if (!showMS) // we will show Adduplex
     {
       if (interstitialAd == null)
       {
         interstitialAd = new AdDuplex.Universal.Controls.WinPhone.XAML.InterstitialAd("184571");
       }
       interstitialAd.ShowAd();
       showMS = true; // next time we will show MS Advertising
     }
     else // we will show MS Advertising
     {
       if (InterstitialAdState.Ready == MsAdvertising.State)
       {
         MsAdvertising.Show();
       }
       showMS = false;
     }
    }), false);
   }
8.1- And don’t forget to add the following line in your MainPage.xaml.cs file.
using Microsoft.Advertising.WinRT.UI;
9- Finally add internet capabilities in your manifest and you are ready to go!


Of course you can extend/improve this code if you want. Additional info here
Some issues that I had
1- If for some reason you need to uninstall Microsoft Universal Adclient SDK, use program like Revo Uninstaller Pro to remove it.
2- Couldn’t make a functional build (MASTER) with VS Enterprise 2015, Succeed with VS Community 2015 …
Nunca tuve inconvenientes en crear los iconos que te pide el editor de Unity3D para iOS y Android… para Android te pide unos 6 iconos y para iOS 8 iconos… por supuesto podes seleccionar un icono grande y dejar que Unity3D te re-escale automáticamente (esta opción nunca terminaba de verse bien en el dispositivo) y la otra era re-escalar manualmente en Photoshop los iconos en esos tamaños y asignarlos uno por uno.

Podía vivir con eso… hasta que hace unos días me toco actualizar uno de nuestros juegos para Windows Phone al build Windows Store y para sorpresa mía me encontré con esta brutal ventana

Son casi tantos iconos como Pokemones (son casi 70 íconos)… Googleando un poco me encontré con este excelente SCRIPT para Photoshop por Matt Di Pasquale que sirve para generar los iconos para iOS que luego utilicé para adaptar a mis necesidades.
Pueden acceder al script en el siguiente link
https://gist.github.com/pescode/223aa7b7f24676cc902b
De plus incluí los scripts para generar los iconos que te pide Unity para hacer los builds para Android e iOS.
Modo de uso:
- Descargar los scripts

- Para Windows Store, crear un icono grande de por lo menos 1240×1240 pixeles y otro de 1240×600 pixeles.
- Abrir Photoshop, ir a File -> Scripts -> Browse y seleccionar el script WinStore icons.jsx
- Abrir las iconos que creaste cuando te pregunte. Seleccionar carpeta en donde se van a guardar los iconos y LISTO! Más de 60 iconos en menos de 10segs.
Una versión de tu app/juego puede tener varios APK… esto puede ser muy útil de muchas formas, personalmente utilizo para subir el build ARMv7 y x86 por separado, así el tamaño que ocupa tu APK será mucho menor para el usuario final.
Para empezar, seguimos una regla muy sencilla, vamos a suponer que tenemos un update de nuestro juego, la version 1.2. Obviamente en el manifest colocamos la version “1.2” y a la version que será para ARMv7 le ponemos el build por ejemplo “4”. Luego, para la version x86, mantenemos la version “1.2” pero el build le ponemos “5”.
Una vez que tenemos listos nuestros 2 APK, vamos al dashboard de nuestro proyecto, y entramos en APK. Buscamos y hacemos click en el botón SWITCH TO ADVANCED MODE.

Una vez hecho esto, subimos nuestro primer APK, el que tiene el build “4” y desactivamos el APK anterior si es que hay alguno. Para guardar los cambios hacemos click en Publish now. Repetimos el proceso pero esta vez subimos el APK con el build “5”.

Para finalizar, hacemos click nuevamente en Publish now y una vez que el update este disponible, Google Play se encargará de distribuir el APK correcto al usuario.

Pueden encontrar más información en http://developer.android.com/google/play/publishing/multiple-apks.html
Hace unos días tuve la tarea de optimizar varios de los juegos que tenemos en Roshka Studios, y uno de los objetivos fue reducir el tamaño de los builds. Por ejemplo, MiniChase es un pequeño juego con un par de objetos 3D, sonidos, de 1 solo nivel y pesa 28mb!.
Primero, tenemos que saber que es lo está ocupando tanto espacio, para saber eso, abrimos la ventana CONSOLE de Unity y hacemos click en el pequeño botón que esta justo debajo de la X y seleccionamos la opción OPEN EDITOR LOG.

Limpiamos el log de la ventana con Clear Display para evitar perdernos y luego generamos nuestro build ( en el caso de Windows probablemente se abra el bloc de notas asi que probablemente no van a poder seleccionar todo, borrar y guardar mientras este ejecutandose Unity )… una vez listo, scroleamos un poco el log hasta encontrar una información como la imagen de abajo.

Ahi podemos darnos cuenta de que es lo que nos ocupa tanto espacio. Tambien pueden pescar por assets que no estan utilizando pero que estan siendo incluidos en el build.
Tips rápidos para reducir el tamaño
- Texturas y Sprites: Elegir el formato COMPRESSED y desactivar la opción GENERATE MIPMAPS para las texturas en donde los mipmaps no son tan importantes.

- Sonidos: Elegir el formato VORBIS y reducir la calidad.

- Android: En vez de utilizar la opción FAT en el BUILD SETTINGS, crear los builds ARMV7 y x86 por separado (para subir ambos builds en el playstore van a necesitar realizar unos pasos adicionales… les muestro en otro post), o crear solo el build ARMV7 y subir solo ese build… los dipositivos x86 pueden correr builds ARMV7.

- Activar Stripping Level: El mejor sería micro mscorlib pero podría generar problemas, yo normalmente selecciono el intermedio que es byte code, hasta ahora no noto casi ninguna diferencia en el tamaño entre las distintas opciones.

- iOS: En el build settings, en Script call optimization level seleccionar Fast but no exceptions.
- En API Compatibility Level seleccionar .NET 2.0 subset.
- Cuando importen un Mesh activen la opción Compression en el Import Settings del mesh.
Si les interesa saber en cuanto quedo el tamaño del apk de MiniChase gracias a estas optimizaciones les dejo la precisa…
Version ORIGINAL FAT (ARMv7 y x86): 28mb
Version FAT (ARMv7 y x86): 23.6mb (-4.4mb)
Version ARMv7: 14.9mb (-13.1mb)
Version x86: 15.3mb (-12.7mb)
Always make the first level last
Making games because you want to make games, instead of making games as just a way to earn money, is the better way to be doing this.
Make better games, not bigger games.
